You don’t have permission to access /awstats/awstats.pl on this server

    1 Comment
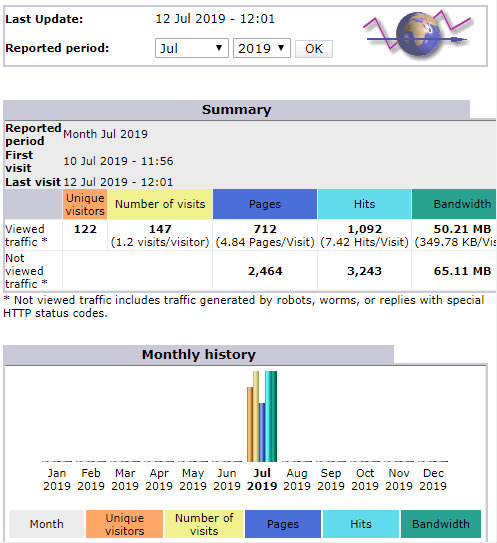
    AWStats main screen

    Installing AWStats 7 via yum on CentOS 7 with Apache 2.4 and resolving the error “You don’t have permission to access /awstats/awstats.pl on this server

    Step 1: Minimum prerequisites

    yum install epel-release
    yum install httpd
    systemctl enable httpd
    systemctl start httpd

    Step 2: Install AWStats

    The following (at the time of this post) installed version 7.7 (build 20180105)

    yum install awstats

    Step 3: Configure apache configuration file for AWStats

    When AWStats is installed onto CentOS via yum it puts an awstats.conf file in /etc/httpd/conf.d folder. Need to make a couple of changes to this to avoid getting a “You don’t have permission to access /awstats/awstats.pl on this server” error and to be able to access AWStats over the network.

    # Alias /awstatsclasses "/usr/share/awstats/wwwroot/classes/"
    # Alias /awstatscss "/usr/share/awstats/wwwroot/css/"
    # Alias /awstatsicons "/usr/share/awstats/wwwroot/icon/"
    # ScriptAlias /awstats/ "/usr/share/awstats/wwwroot/cgi-bin/"
    ScriptAlias /awstats/ "/var/www/cgi-bin/"
    
    <Directory "/usr/share/awstats/wwwroot">
         Options None
         AllowOverride None
         <IfModule mod_authz_core.c>
             # Apache 2.4
             Require host 192.168.0.0/24
         </IfModule>
         <IfModule !mod_authz_core.c>
             # Apache 2.2
             Order allow,deny
             Allow from 192.168.0.0/24
             Allow from ::1
         </IfModule>
    </Directory>
    
    <IfModule mod_env.c>
         SetEnv PERL5LIB /usr/share/awstats/lib:/usr/share/awstats/plugins
    </IfModule> 

    First, comment out the first four lines with a # as the first character of each line. This will break it, but we’ll fix it soon.

    Add the new ScriptAlias line.

    Next add the “Require host” line (or multiple lines) to suit your needs. Just in case your using Apache 2.2 still, add the “Allow from” line too.

    The last block may not format nicely in a browser, but it should be a single line of text between the open and close IfModule tags. (It may wrap the text in your browser, so take care).

    Step 4: Copy some files to make it work

    In step 3 we commented out the first few lines, however we still need those parts served by apache. We’re going to copy them to within /var/www which overcomes the permission problem.

    Create the following directories in /var/www/html (or the document root of your web server)

    mkdir /var/www/html/awstatsclasses
    mkdir /var/www/html/awstatscss
    mkdir /var/www/html/awstatsicons

    Now copy the files to the newly created folders plus the pearl scripts to the cgi-bin folder

    cd /var/www/html
    cp -r /usr/share/awstats/wwwroot/classes/* awstatsclasses/
    cp -r /usr/share/awstats/wwwroot/css/* awstatscss/
    cp -r /usr/share/awstats/wwwroot/icon/* awstatsicons/
    cp -r /usr/share/awstats/wwwroot/cgi-bin/* /var/www/cgi-bin/

    Step 5: Restart apache http server

    systemctl restart httpd

    Step 6: Create a post yum update script

    The challenge with a work around is updating with yum, the updates don’t carry over. I’ve always handled this by using a post yum update script that I run after each time I do a yum update. It shouldn’t matter if the particular application is not updated, it’s just a good habit.

    Actions to complete after a yum update.

    #!/bin/bash
    /usr/bin/cp -r /usr/share/awstats/wwwroot/classes/* /var/www/html/public/awstatsclasses/
    /usr/bin/cp -r /usr/share/awstats/wwwroot/css/* /var/www/html/public/awstatscss/
    /usr/bin/cp -r /usr/share/awstats/wwwroot/icon/* /var/www/html/public/awstatsicons/
    /usr/bin/cp -r /usr/share/awstats/wwwroot/cgi-bin/* /var/www/cgi-bin/
    chown -R /var/www/html
    chown -R /var/cgi-bin

    Caution of line wrapping with the above! After the #!/bin/bash it’s 4 lines beginning with /usr/bin.

    Change ownership to apache for the folders created and files just copied.

    chown -R /var/www/html
    chown -R /var/cgi-bin

    Step 7: Configure AWStats

    The following is very high level to get you going to test the above. There are quite a few resources already on the Internet that provide good detail on how to configure AWStats including modifying logs and multiple domain systems.

    An initial configuration will have been created in /etc/awstats by the installer based on the host name of your sever with a name something like awstats.yourdomain.com.conf. Open it in your favorite text editor and validate it’s configuration settings.

    Now run the update utility to generate the data for the AWStats pagees using:

    perl /usr/share/awstats/wwwroot/cgi-bin/awstats.pl -config=web.iotsd.io -update

    Step 8: View in web browser

    If all went well, you will now be able to view your data via a web browser by visiting:

    http://yourdomain.com/awstats/awstats.pl?config=yourdomain.com